
How to make Australia Steel Fence Kit
10 Dec
What is a Steel Fence Kit?
A pre-packaged set of all necessary components to build a specific length and style of steel fencing. They are designed for DIY installation or for tradespeople to streamline jobs. The panels are typically made from pre-painted steel (often Colorbond® or equivalent).
What’s Typically Included in a Kit?
Kits are usually sold per lineal metre (e.g., a 10m kit, 20m kit). A standard kit for a 1.8m high fence includes:
-
Fence Panels: Pre-formed steel sheets (often 750mm wide).
-
Posts: Both end/ corner posts and line posts. Posts are usually C-section or square.
-
Post Caps: To fit on top of each post for a finished look and weather protection.
-
Rails (sometimes): For certain styles, like "slat" fences.
-
Fasteners: All necessary screws and bolts (colour-matched where possible).
-
Fixing Brackets (for some systems): To attach panels to posts.
-
Concrete & Aggregates are NOT included. You must purchase these separately.
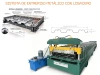
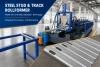
We can customize roll forming machines to make fence panels and fence posts and fence rails
Fence panel machine( it makes two different fence sheet)
.webp)
.webp)
.webp)
Fence posts machine
.webp)
.webp)
Fence post machine
.webp)
.webp)
.webp)
Installation Overview
Step 1: Mark Out & Plan
-
Run a string line along the exact fence line, secured with pins.
-
Mark the position of each post. Standard spacing is the width of your panels (usually 750mm or 2100mm, check your kit). Start and end with an "end post," with "line posts" in between.
-
Pro Tip: If your fence changes direction, you'll need a "corner post."
Step 2: Dig Post Holes
-
Hole Diameter: ~200-300mm wide.
-
Hole Depth: CRITICAL. For a 1.8m fence, dig at least 600mm deep. In sandy soil or high wind areas, go deeper (750mm-900mm). Depth ensures stability.
-
Place a small amount of aggregate in the bottom of each hole for drainage.
Step 3: Set the End/Corner Posts (The Most Important Step)
-
Place your first end post in its hole.
-
Use your spirit level to ensure it is perfectly plumb (vertical) in both directions.
-
Brace it firmly with timber off-cuts so it cannot move.
-
Mix and pour concrete around the post. Slope the concrete slightly away from the post ("crown it") to shed water.
-
DO NOT ATTACH PANELS YET. Let this post's concrete cure for at least 24 hours. This fixed post is your anchor for the whole fence.
Step 4: Install the First Panel & Second Post
-
Once the first post is set, take your first fence panel.
-
Following your specific kit's instructions, attach the panel to the first set post using the provided screws. (Many kits have a "post-in" system).
-
Slide the next line post into the free edge of the attached panel.
-
Place this post in its hole. Use your string line and spirit level to align it perfectly with the first post—both plumb and at the correct height.
-
Brace this post securely. Check the panel is level.
-
Concrete this post in. You can now continue along the line while this concrete sets, as the panel is holding the post in position.
Step 5: Continue the Run
-
Repeat Step 4 for the entire length: attach next panel to the free side of the post you just set, insert new post, align, brace, concrete.
-
Constantly check for alignment with your string line and for plumb.
Step 6: Set the Final End Post
-
The last post will be an end post. Ensure it is plumb and braced before concreting.
Step 7: Final Touches
-
Allow all concrete to cure for at least 24-48 hours before removing braces or applying pressure.
-
Install post caps: Snap or screw the provided colour-matched caps onto each post. This keeps water out and finishes the look.
-
Trim final panel (if needed): If your run isn't a perfect multiple of the panel width, the last panel will need trimming. Measure carefully, mark, and cut with an angle grinder or fine-tooth saw. File any sharp edges.
-
Clean up any concrete splatter or dirt from the panels with water and a soft cloth.
.webp)

Recent Posts

October 26, 2016
The Most Successful Engineering Contractor


.webp?x-oss-process=image/resize,w_100/quality,q_100)